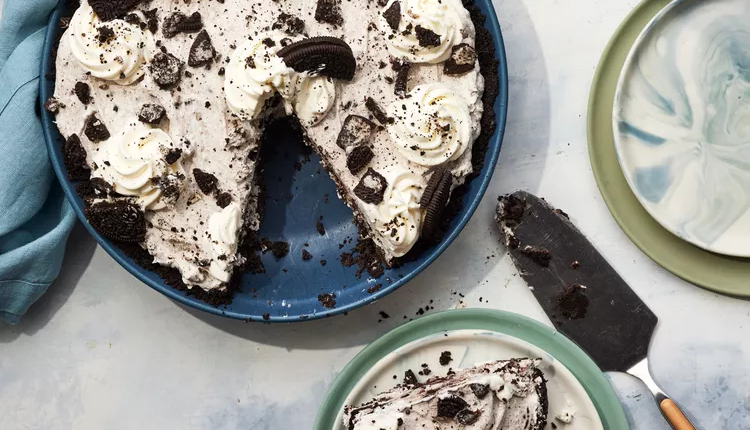
No-Bake Oreo Pie: A Decadent, Easy-to-Make Dessert 🍪🥧
This No-Bake Oreo Pie is a dream come true for Oreo lovers! Featuring a crunchy cookie crust, creamy filling, and luscious topping, it’s a no-fuss, no-oven-required dessert perfect for any occasion. With its rich flavor and creamy texture, this dessert is guaranteed to impress.
🍴 Ingredients
For the Crust
- 24 cream-filled chocolate sandwich cookies (about 10 oz.)
- 4 Tbsp unsalted butter, melted
- 1/8 tsp kosher salt
For the Filling
- 1 cup heavy whipping cream
- 1 (8-oz.) package cream cheese, softened
- 1 cup (about 4 oz.) powdered sugar
- 1 tsp vanilla extract
- 15 cream-filled chocolate sandwich cookies, coarsely crushed (about 2 cups)
For the Topping
- 3/4 cup heavy whipping cream
- 2 Tbsp powdered sugar
- 2 additional cream-filled chocolate sandwich cookies, finely crushed (for garnish)
🥄 Directions
1️⃣ Prepare the Crust
- Process cookies in a food processor until fine crumbs form. Add melted butter and salt; pulse until combined.
- Transfer the mixture to a 9-inch pie plate. Press evenly up the sides and into the bottom. Freeze uncovered for 15 minutes to harden.
2️⃣ Make Whipped Cream
- In a large bowl, beat heavy whipping cream on high speed with an electric mixer until stiff peaks form (about 2 minutes).
3️⃣ Make the Filling
- In a separate bowl, beat cream cheese, powdered sugar, and vanilla until smooth and creamy.
- Fold the whipped cream into the cream cheese mixture in three additions until fully combined.
- Gently fold in the coarsely crushed cookies.
4️⃣ Assemble the Pie
- Transfer the filling into the prepared crust, smoothing it into an even layer with a spatula.
- Cover loosely with plastic wrap and refrigerate for at least 6 hours, or up to 24 hours, until firm.
5️⃣ Prepare the Topping
- Beat heavy whipping cream and powdered sugar until stiff peaks form. Transfer to a piping bag for decoration.
6️⃣ Decorate and Serve
- Decorate the pie with dollops of whipped cream, finely crushed cookies, and additional cookie pieces as desired. Serve immediately.
💡 Pro Tips for the Perfect No-Bake Oreo Pie
- Crush for Texture: Use a rolling pin to crush cookies for varying sizes in the filling. This adds a delightful texture contrast.
- Chill Completely: Be patient! Allow the pie to chill for at least six hours to ensure a firm, sliceable texture.
- Clean Slices: For neat slices, run a knife under hot water and wipe it dry before cutting. Repeat between each slice.
- Switch It Up: Swap out traditional Oreos for flavored versions like mint, peanut butter, or golden Oreos for a fun twist!
FAQs
1. Can I use pre-made whipped topping?
Yes! If you’re short on time, substitute whipped topping like Cool Whip in equal amounts.
2. How long can I store the pie?
Store the pie in the refrigerator for up to 5 days, tightly covered. You can also freeze the crust alone for up to 3 weeks before filling.
3. Can I make individual portions?
Absolutely! Use a cupcake tin with liners to create mini Oreo pies for easy, portable servings.
Common Mistakes and Solutions
Mistake 1: Soggy Crust
- Solution: Freeze the crust fully before adding the filling to ensure it stays firm.
Mistake 2: Runny Filling
- Solution: Whip the cream to stiff peaks and chill the pie for the recommended time to set properly.
Mistake 3: Over-sweetened Filling
- Solution: Balance the sweetness by using less powdered sugar or adding a pinch of salt to the filling.
Ways to Serve No-Bake Oreo Pie
- With Ice Cream: Serve with a scoop of vanilla or chocolate ice cream for extra indulgence.
- Drizzle It: Add chocolate syrup or caramel sauce for added flavor.
- Custom Decorations: Sprinkle colorful toppings or seasonal candies for festive occasions.
Keywords
No-bake Oreo pie, Oreo dessert, cookie crust pie, no-bake dessert, Oreo cream pie, chocolate pie recipe, no-bake pie recipe, easy Oreo recipe, creamy Oreo filling, holiday dessert ideas
Don’t miss interesting posts on Famousbio
