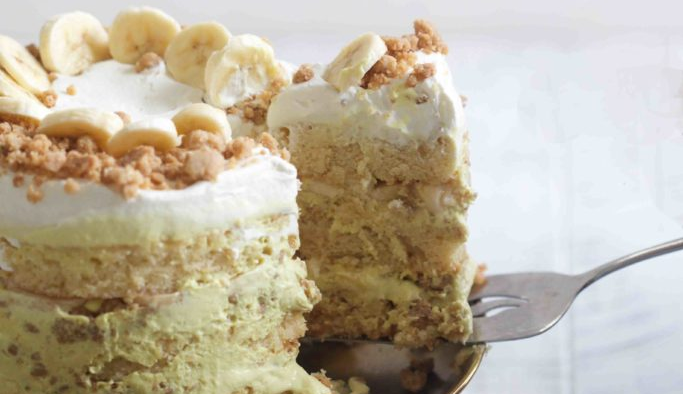
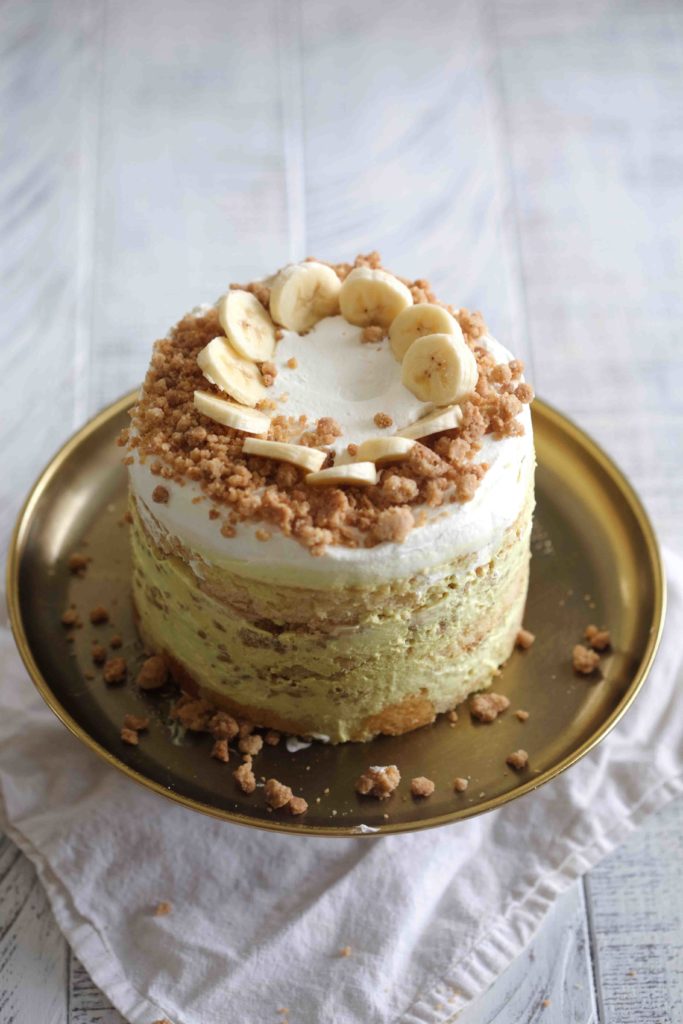
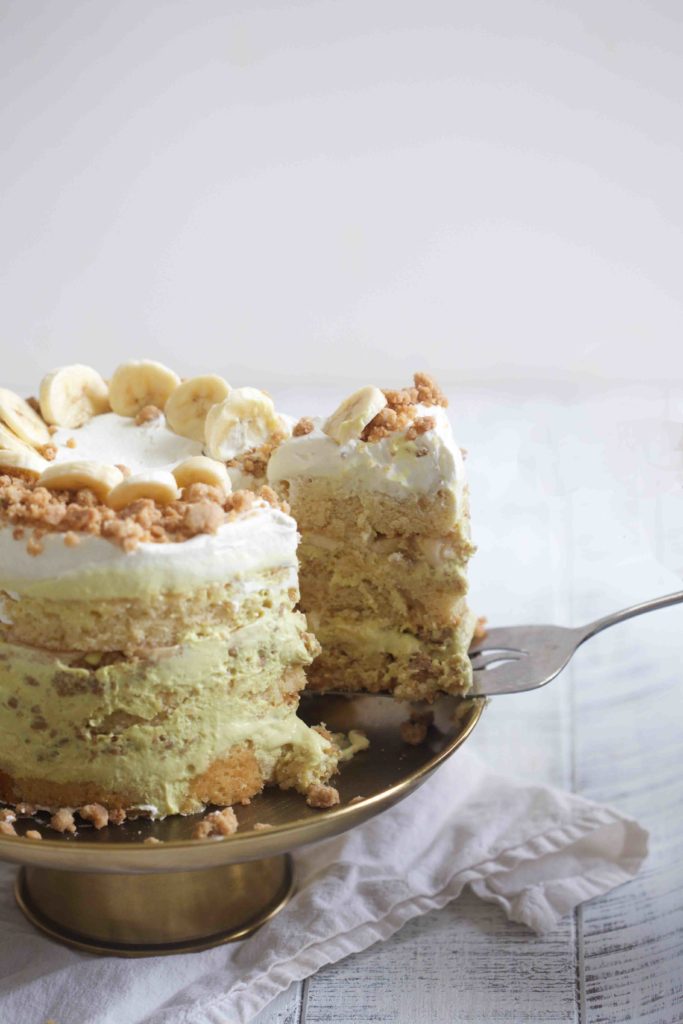
This cake may appear difficult, but with a little forethought, it’s completely feasible. I recommend starting 3-4 days before you plan to serve the cake by making the banana cream one day, the crunch the next, the cake the next, and then assembling it all and freezing it overnight.
Ingredients
For the banana cream:
- About two very very ripe bananas (brown is best!) (225g)
- 1/3 cup heavy cream (75g)
- 1/4 cup milk (55g)
- 1/2 cup sugar (100 g)
- 2 tablespoons cornstarch (25g)
- 1/2 teaspoon kosher salt (2g)
- 3 egg yolks
- 1 teaspoon powdered gelatin
- 3 tablespoon butter (40 g)
- 1/4 teaspoon turmeric*
- 3/4 heavy cream (160 g)
- 1/2 cup powdered sugar (80 g)
Vanilla wafer crunch:
- 1 cup vanilla wafer crumbs** (100g)
- 1/2 cup flour (20g)
- 1/2 cup sugar (50g)
- 7 tablespoons butter, melted (100g) ***
Vanilla cake:
- 1 stick of butter at room temperature (115g)
- 1 1/4 cup granualted sugar (250g)
- 1/4 cup tightly packed brown sugar (60 g)
- 3 eggs, room temperature
- 1/2 cup buttermilk (110g)
- 1/2 cup vegetable oil (75g)
- 1 tablespoon vanilla extract (12 g)
- 1 1/2 cups all purpose flour (185g)
- 1 teaspoon baking powder (4g)
- 1 teaspoon salt (4 g)
Milk soak:
- 1/2 cup milk
- 1 teaspoon vanilla extract
For topping:
- 2 fresh bananas for layers and topping
- 1/2 cup whipping cream
- 1 tablespoon powdered sugar
Instructions
First make the banana cream:
- In a blender, puree the two bananas, heavy cream, and milk until completely smooth (you could also use an immersion blender or food processor.)
- Add the white sugar, cornstarch, salt, and egg yolks when the mixture is totally smooth. Wipe the blender clean before pouring the contents into a medium saucepan.
- Sprinkle 1 tablespoon powdered gelatin evenly across the surface of a small dish filled with 2 teaspoons cold water to bloom. When the gelatin is soft, approximately 2 minutes, it is bloomed.
- Whisk the pudding mixture continually over medium-low heat. The banana mixture will thicken as it warms up. Bring to a boil, then whisk rapidly for another 2 minutes to properly cook off the starch. It will be thick and light in color.
- Return the contents of the pan to your blender, food processor, or immersion blender-equipped bowl. Blend in the bloomed gelatin and 3 tablespoons butter until the mixture is smooth and evenly distributed. If desired, add additional turmeric, a little at a time, until the desired hue is achieved. (Taste after each addition to ensure that the flavor is hidden.)
- Transfer the banana mixture to a heatproof container and chill for 30 to 60 minutes, depending on how long it takes to cool fully.
- Make whipped cream by mixing 3/4 cup heavy cream and 1/2 cup powdered sugar once the banana mixture has cooled. To get medium-soft peaks, use a hand mixer or whisk by hand.
- Slowly whisk the cooled banana mixture into the whipped cream until it is equally colored and homogeneous — the combination should be a pale yellow hue. Refrigerate for up to a week, well-covered, until ready to construct the cake.
For the Vanilla Wafer Crunch:
- Preheat the oven to 275 degrees Fahrenheit.
- Combine the wafer crumbs, flour, sugar, and melted butter in a medium-sized mixing basin. Mix until everything is moist and well combined.
- Bake for 20 minutes, breaking up some of the crumbs halfway through, on a paper or Silpat prepared baking sheet. After 20 minutes, the crunch should be somewhat browned and buttery smelling, but still soft. (As it cools, it will stiffen and become crunchy.)
- The crunch may be kept in an airtight jar for up to a week after chilling.
For the Vanilla Cake:
- Preheat the oven to 350 degrees Fahrenheit. Using parchment paper or a silicone baking mat, grease and line a quarter sheet pan.
- In the bowl of a stand mixer fitted with the paddle attachment, cream together the butter and sugars for 2 to 3 minutes on medium-high. Scrape down the sides of the bowl, add the eggs, and mix for another 2 to 3 minutes on medium-high. Scrape down the bowl’s sides once more.
- Stream in the buttermilk, oil, and vanilla on moderate speed. Increase the mixer speed to medium-high and continue to paddle for 4 to 6 minutes, or until the mixture is almost white, twice the size of the fluffy butter-and-sugar mixture, and totally homogenous. Don’t hurry through the procedure. You’re essentially dumping too much liquid into a fatty combination that doesn’t want to make place for it. Stop the mixer and scrape the edges of the bowl with a spatula.
- Mix in the flour, baking powder, and salt on a moderate speed. Mix for 45 to 60 seconds, or just until the batter comes together and any dry ingredients are absorbed.
- Scrape the bowl’s sides clean. If any lumps of cake flour remain after scraping, continue mixing for another 45 seconds.
- In the pan, spread the cake batter in a uniform layer. To smooth out the layer, tap the bottom of the sheet pan on the counter.
- Preheat oven to 350°F and bake for 30–35 minutes, or until puffy and doubled in size, and the center is firm. The cake should bounce back slightly when gently probed with your finger.
- Remove from the oven and place on a wire rack to cool. Wrapped in plastic wrap, store in the fridge or freezer for up to 5 days.
For the milk soak:
- Just before constructing the cake, whisk together the milk and vanilla extract.
To assemble cake:
- On the counter, place a piece of parchment or a silpat. Remove the parchment or silpat off the bottom of the cake and invert it onto it. Stamp two circles from the cake with a 6-inch cake ring. These are the top two layers of your cake. The bottom layer will be made up of the remaining cake “scrap.”
Layer 1 the bottom:
- Clean the cake ring and lay it in the middle of a sheet pan lined with parchment paper or a Silpat. Line the interior of the cake ring with 1 piece of acetate and tape it together on the exterior.
- Place the cake scraps within the ring and crush them together with the back of your palm to form a flat, equal layer.
- Dip a pastry brush into the vanilla milk and generously coat the cake layer with 1/3 of the milk.
- Spread 1/3 of the banana cream evenly over the cake using the back of a spoon.
- Sprinkle 1/3 of the crunch over the banana cream and press it down with the back of your palm.
Layer 2:
- Gently insert the second strip of acetate between the cake ring and the top 1/4 inch of the first strip of acetate with your index finger, creating a transparent acetate ring 5-6 inches tall, tall enough to maintain the completed cake’s height. Place a cake round on top of the crunch and continue the soaking, banana cream, and crunch process.
- The third cake layer goes on top of a layer of thinly sliced bananas.
- Soak the top cake layer in the banana cream, then top with the remaining banana cream and wrap the cake in plastic wrap (just to keep the top covered.) To firm the cake and filling, freeze for at least 12 hours. It will keep for up to 2 weeks in the freezer.
- Pull the sheet pan out of the freezer and pop the cake out of the cake ring at least 3 hours before serving. Remove the acetate from the cake and place it on a dish or cake stand. Allow at least 3 hours for it to thaw in the fridge.
- Whip the cream and powdered sugar until firm peaks form before serving. Spread the leftover crunch on top of the cake, along with some banana slices if preferred.
Source: The Baker Chick
Don’t miss interesting posts on Famousbio

