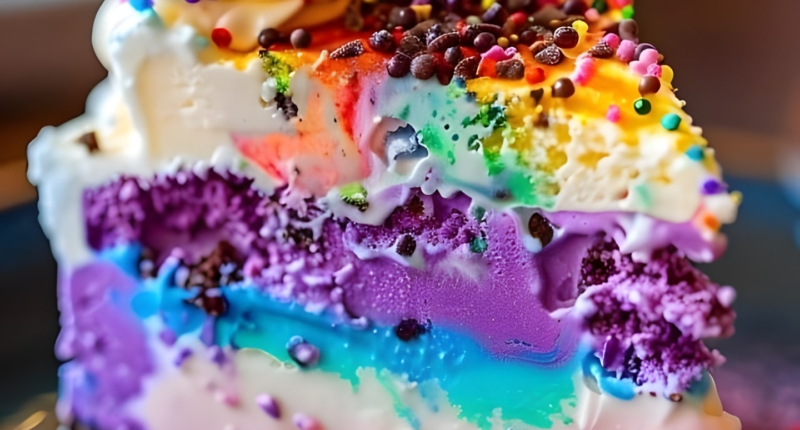
Ultimate Galaxy Ice Cream Cake 🍨
Introduction Turn your dessert dreams into a cosmic reality with the Ultimate Galaxy Ice Cream Cake! This colorful and decadent treat layers vanilla and chocolate ice cream with vibrant sherbets, crushed cookies, and glittering toppings. Perfect for birthdays, parties, or any occasion that calls for an out-of-this-world dessert experience.
Ingredients:
- 1.5 qt vanilla ice cream, softened
- 1.5 qt chocolate ice cream, softened
- 1 cup blue raspberry sherbet, softened
- 1 cup grape sherbet, softened
- 1 cup crushed chocolate cookies
- 1/2 cup hot fudge sauce
- 1/2 cup caramel sauce
- 1 cup whipped cream
- 1/4 cup edible glitter
- 1/4 cup star-shaped sprinkles
Instructions:
1. Layer the Ice Cream:
- In a large bowl, prepare your ingredients by softening the ice creams and sherbets for easy layering.
- Layer the softened vanilla ice cream, chocolate ice cream, blue raspberry sherbet, and grape sherbet into a 9-inch springform pan. Smooth the top of each layer for a clean finish.
2. Add Cookie Crumble:
- Evenly sprinkle crushed chocolate cookies over the top of the sherbet layer.
3. Freeze the Cake:
- Place the assembled cake in the freezer and freeze for at least 4 hours or until firm.
4. Add Toppings:
- Once frozen, remove the cake from the freezer.
- Drizzle hot fudge sauce and caramel sauce over the top of the cake.
5. Decorate:
- Spread whipped cream evenly over the cake.
- Sprinkle edible glitter and star-shaped sprinkles for a dazzling galaxy effect.
6. Final Chill:
- Return the decorated cake to the freezer for 30 minutes to set the toppings.
7. Serve and Enjoy:
- Slice and serve your Ultimate Galaxy Ice Cream Cake for a show-stopping dessert that’s as fun to eat as it is to look at!
Tips for Success:
- Softening Ice Cream: Let the ice cream sit at room temperature for 5-10 minutes until it’s soft enough to spread but not melted.
- Preventing Stickiness: Line the bottom of the springform pan with parchment paper for easy removal.
- Customization: Swap sherbet flavors to match your favorite color palette or theme.
Frequently Asked Questions:
Q: Can I make this cake ahead of time? A: Yes! Prepare the cake up to two days in advance and store it tightly covered in the freezer.
Q: How do I ensure clean slices? A: Dip a sharp knife in hot water, dry it, and slice the cake for neat pieces.
Q: What can I use if I don’t have a springform pan? A: Use a regular 9-inch cake pan lined with plastic wrap for easy removal.
Q: Can I make a dairy-free version? A: Absolutely! Use dairy-free ice cream and whipped topping for a vegan-friendly option.
Common Mistakes and Solutions:
- Mistake: Uneven layers. Solution: Use a spatula to smooth each layer before adding the next.
- Mistake: Ice cream melting during assembly. Solution: Work quickly and return the cake to the freezer between layers if needed.
- Mistake: Toppings sliding off. Solution: Ensure the cake is well-frozen before adding sauces and whipped cream.
Don’t miss interesting posts on Famousbio
