Nutella Oreo Cheesecake Drip Cake: A Decadent Dessert Delight 🍫🍪
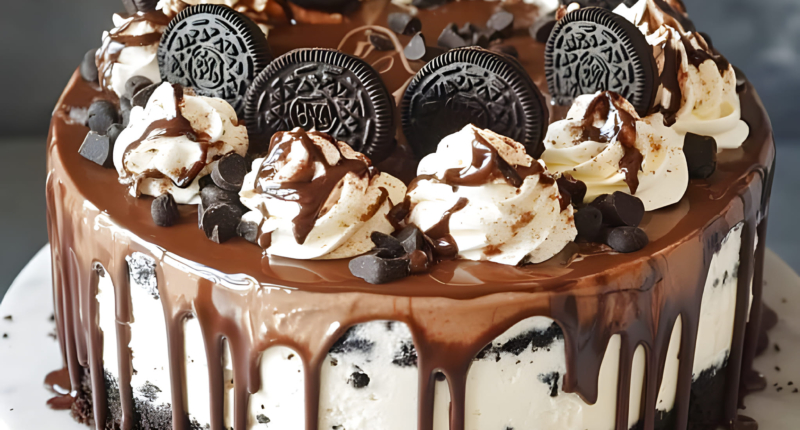
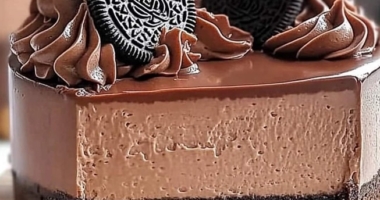
This Nutella Oreo Cheesecake Drip Cake is the ultimate indulgence for chocolate lovers. With a crunchy Oreo crust, creamy Nutella cheesecake filling, and a stunning Nutella glaze, it’s a show-stopping dessert for any occasion!
Why You’ll Love This Cheesecake
- Rich and Creamy: The Nutella cheesecake filling is smooth, luscious, and packed with flavor.
- Crunchy Texture: The Oreo crust and optional crushed Oreos on the sides add a delightful crunch.
- Gorgeous Presentation: The Nutella drip glaze elevates the look, making it perfect for celebrations.
- Versatile Toppings: Customize with Oreos, whipped cream, or other favorite garnishes.
Ingredients
For the Crust:
- 250g Oreo cookies (crushed)
- 100g melted butter
For the Filling:
- 500g cream cheese (at room temperature)
- 200g Nutella
- 200ml heavy cream
- 150g sugar
- 3 large eggs
- 1 tsp vanilla extract
For the Drip Glaze:
- 150g Nutella
- 100ml heavy cream
For Decoration (Optional):
- Oreo cookies (whole or crumbled)
- Whipped cream
- Chocolate chips
- Chocolate syrup
For the Sides (Optional):
- 100g crushed Oreo cookies
Instructions
Step 1: Prepare the Crust
- Preheat the oven to 350°F (175°C). Grease a 9-inch springform pan.
- Mix crushed Oreo cookies and melted butter in a medium bowl until well combined.
- Press the mixture firmly into the bottom of the prepared pan to form an even crust. Set aside.
Step 2: Make the Filling
- In a large bowl, beat the cream cheese and sugar until smooth and creamy.
- Add the Nutella and mix until fully incorporated.
- Add eggs one at a time, beating well after each addition. Stir in vanilla extract.
- In a separate bowl, whip the heavy cream until soft peaks form, then gently fold it into the Nutella mixture.
- Pour the filling over the prepared crust, smoothing the top with a spatula.
Step 3: Bake the Cheesecake
- Bake the cheesecake for 55–60 minutes, or until the center is set but slightly jiggly.
- Turn off the oven and leave the cheesecake inside with the door slightly ajar to cool gradually.
- Once cooled, refrigerate for at least 4 hours or overnight to allow it to set completely.
Step 4: Prepare the Drip Glaze
- Heat the heavy cream in a small saucepan over medium heat until it begins to simmer.
- Remove from heat and stir in the Nutella until smooth and glossy.
- Let the glaze cool slightly before drizzling it over the chilled cheesecake, letting it drip down the sides.
Step 5: Decorate the Cake
- Decorate the top with whole or crumbled Oreo cookies, whipped cream, chocolate chips, or chocolate syrup as desired.
- For extra flair, press crushed Oreo cookies around the sides of the cake.
Step 6: Serve and Enjoy
- Slice and serve chilled. This rich and indulgent dessert pairs perfectly with a cup of coffee or a glass of milk.
Tips for Success
- Room Temperature Ingredients: Ensure the cream cheese and eggs are at room temperature for a smoother filling.
- Avoid Overmixing: Mix the batter just until combined to prevent cracks.
- Cool Gradually: Cooling the cheesecake in the oven helps minimize cracks and keeps the texture creamy.
- Chill Fully: Allow the cheesecake to set in the refrigerator for the best flavor and consistency.
Storage Instructions
- Refrigeration: Store in an airtight container in the refrigerator for up to 5 days.
- Freezing: Wrap slices in plastic wrap and aluminum foil before freezing for up to 2 months. Thaw in the refrigerator overnight before serving.
Variations and Substitutions
- Flavor Options: Add a layer of peanut butter or caramel sauce for extra indulgence.
- Alternative Crusts: Swap Oreo cookies for digestive biscuits or graham crackers.
- Dark Chocolate Twist: Use dark chocolate instead of Nutella for a richer flavor.
FAQs
Q: Can I use low-fat cream cheese?
A: Full-fat cream cheese is recommended for the best texture and flavor, but low-fat can be used if needed.
Q: How do I get clean slices?
A: Dip a knife in hot water, wipe it dry, and slice. Repeat for each cut for clean edges.
Q: Can I make this cheesecake ahead of time?
A: Yes! This cheesecake can be made 1–2 days ahead and stored in the refrigerator until ready to serve.
Don’t miss interesting posts on Famousbio

