Ingredients
CHOCOLATE AVOCADO OIL CAKE:
- (Makes 2, 6-inch round cakes)
- 1 cup all purpose flour (170 gms)
- ½ cup almond flour ( 62 gms)
- 1/3 cup cocoa powder (30 gms)
- 2/3 cup brewed coffee (warm)
- 1 tbsp vanilla extract
- 1 tsp baking soda
- ½ tsp salt
- ¾ cup granulated sugar ( 160 gms)
- ½ cup brown sugar (92 gms)
- 3 large eggs
- 3/4 cup of La Tourangelle Avocado Oil
STRAWBERRY AND PINK PEPPERCORN JAM:
- 2 cups (250gms strawberries cut into cubes)
- ¾ cup granulated sugar ( 160gms)
- 3 tsp ground pink peppercorn
- 3 tbsp lemon juice
STRAWBERRY AND PINK PEPPERCORN BUTTERCREAM FROSTING:
- 3 sticks (339 gms) unsalted butter at room temperature
- 6 cups (750 gms) of confectioner’s sugar, sifted
- 2 tsp vanilla extract
- 1/3 cup strawberry and pink peppercorn jam
- 1/2 tsp ground pink peppercorn
- 4 tbsp whole milk
FOR THE DECORATION:
- 1 stick (113 gms) unsalted butter at room temperature
- 2 cups (250 gms)confectioner’s sugar, sifted
- 3 tbsp whole milk
- 1 tsp vanilla extract
- Food gel colors
- Edible gold leaf

Instructions
CHOCOLATE AVOCADO OIL CAKE:
- Preheat oven to 325 degrees Fahrenheit.
- Grease two 6-inch cake pans with baking spray.
- Whisk together the all-purpose flour, almond flour, baking soda, and salt in a medium mixing basin.
- Whisk together the warm brewed coffee and cocoa powder in a small bowl until the liquid is smooth and free of lumps.
- Add the brown sugar, granulated sugar, and La Tourangelle Avocado Oil to the bowl of a stand mixer fitted with the paddle attachment. Begin at a slow pace for 30 seconds, then gradually raise to a medium speed for 1 minute. At low speed, add the eggs one at a time, followed by the vanilla essence. To integrate, increase the speed to medium for a minute. Clean up the sides with a spatula. Now whisk in the brewed coffee and chocolate mixture to combine everything. To avoid spitting flour everywhere, add the flour mixture in three batches with the mixer on low speed. To integrate, wipe the sides and bottom of the basin with a spatula.
- Divide the batter evenly between the two cake pans. A kitchen scale may be used to ensure that the batter is distributed evenly. Preheat the oven to 350°F and bake the cake pans for 45 minutes, or until a cake tester comes out clean.
- Allow for a half-hour cooling period in the cake pans. Allow the cakes to rest for an hour after gently inverting them out of the tin. Cover the cakes with plastic wrap and set them aside in the fridge for a day.
STRAWBERRY AND PINK PEPPERCORN JAM:
- Add all the ingredients to a medium saucepan over medium heat and stir every 30 seconds or so for 3 minutes. Allow the mixture to come to a boil for about 10 minutes. While it’s boiling, don’t stir it. After 10 minutes of mixing, the froth will have calmed down and the mixture will seem thick. At this point, turn off the stove and allow it to cool fully. Keep the jam refrigerated in a glass jar with a cover. Allow it to cool completely overnight.
STRAWBERRY AND PINK PEPPERCORN BUTTERCREAM FROSTING:
- Add the butter and salt to the bowl of a stand mixer. Mix the butter at high speed for a minute, until frothy and light in color, using a paddle attachment. Combine the strawberry and pink peppercorn jam, ground pink peppercorns, and vanilla essence in a large mixing bowl and thoroughly combine. With a rubber spatula, scrape the bowl’s sides. Whisk in the confectioner’s sugar and milk until fully combined. If you overmix the buttercream, it will get aerated. In a piping bag fitted with a big round tip, place half of the buttercream frosting. Scrape the buttercream to the bottom of the bag with a bench scraper. Keep the bag twisted and clipped aside.
BUTTERCREAM FOR THE DECORATION:
- Add the butter and salt to the bowl of a stand mixer. Mix the butter at high speed for a minute, until frothy and light in color, using a paddle attachment. Mix in the vanilla extract well. With a rubber spatula, scrape the bowl’s sides. Whisk in the confectioner’s sugar and milk until fully combined. If you overmix the buttercream, it will get aerated. Using 4-5 bowls, divide the buttercream. Include the many gradients of a certain color that you enjoy. Pink and brown hues were employed. Each one should be mixed separately with a little spatula until thoroughly combined.
- Prepare the piping bags by filling them with various tips. For the rosettes, I used 1M, and for the other colors, I used different sized star points. Fill each piping bag with each buttercream color. Gather all of the buttercream all the way to the bottom of the bag using a bench scraper. Twist and clip it so it’s ready to use as a decoration.
DECORATE THE CAKE:
- Remove the cake from the fridge the next day. Trim the top layer of both cakes with a broad bread knife to get an uniform and straight edge. Place one layer on a rotating cake stand and cover with a dollop of strawberry and pink peppercorn buttercream icing. Pipe a circle around the bottom layer with the round tip of the piping bag to produce a well in the center. Half of the jam should be poured into the well in the center of the cake as a filling. Allow the jam to reach the same level as the buttercream icing. Place the second layer of buttercream on top of the first. Now we’ll make the crumb coating, starting with a bare layer to keep the crumbs in place. Pipe the buttercream frosting from the piping bag around the cake with the big round tip to produce roughly 3 layers around the cake (it will get done). Turn the turntable and smooth out the frosting using a big offset spatula, keeping the offset spatula perpendicular to the table and smoothing out the icing to cover the whole cake in a light coverage. Scrape the leftover buttercream back into the remaining buttercream bowl using a cake smoother tool. Repeat until the layer is completely smooth. Cover the top of the cake with the icing and smooth it out with the spatula.
- Place the cake in the refrigerator for 30 minutes to solidify. Remove it and, using the big offset spatula, begin spreading the remaining buttercream over the cake to produce a good layer, moving the turntable regularly. The cake icing will be smoothed out as a result of this. Repeat the buttercream application and scraping away excess with a cake smoother technique.
- Using a little offset spatula, hold it under running hot tap water, wipe off the water, then swiftly use the spatula to smooth the sides is the key to creating a perfect icing on the exterior. You’ll get the hang of it in no time. Repeat this process until the cake is completely smooth.
- On top of the cake, repeat the operation. Maintain a 45-degree angle with the little offset spatula as you smooth it out bit by bit, carefully spinning the turntable and scraping the excess into the buttercream bowl. Allow the finished cake to cool in the refrigerator for a few hours.
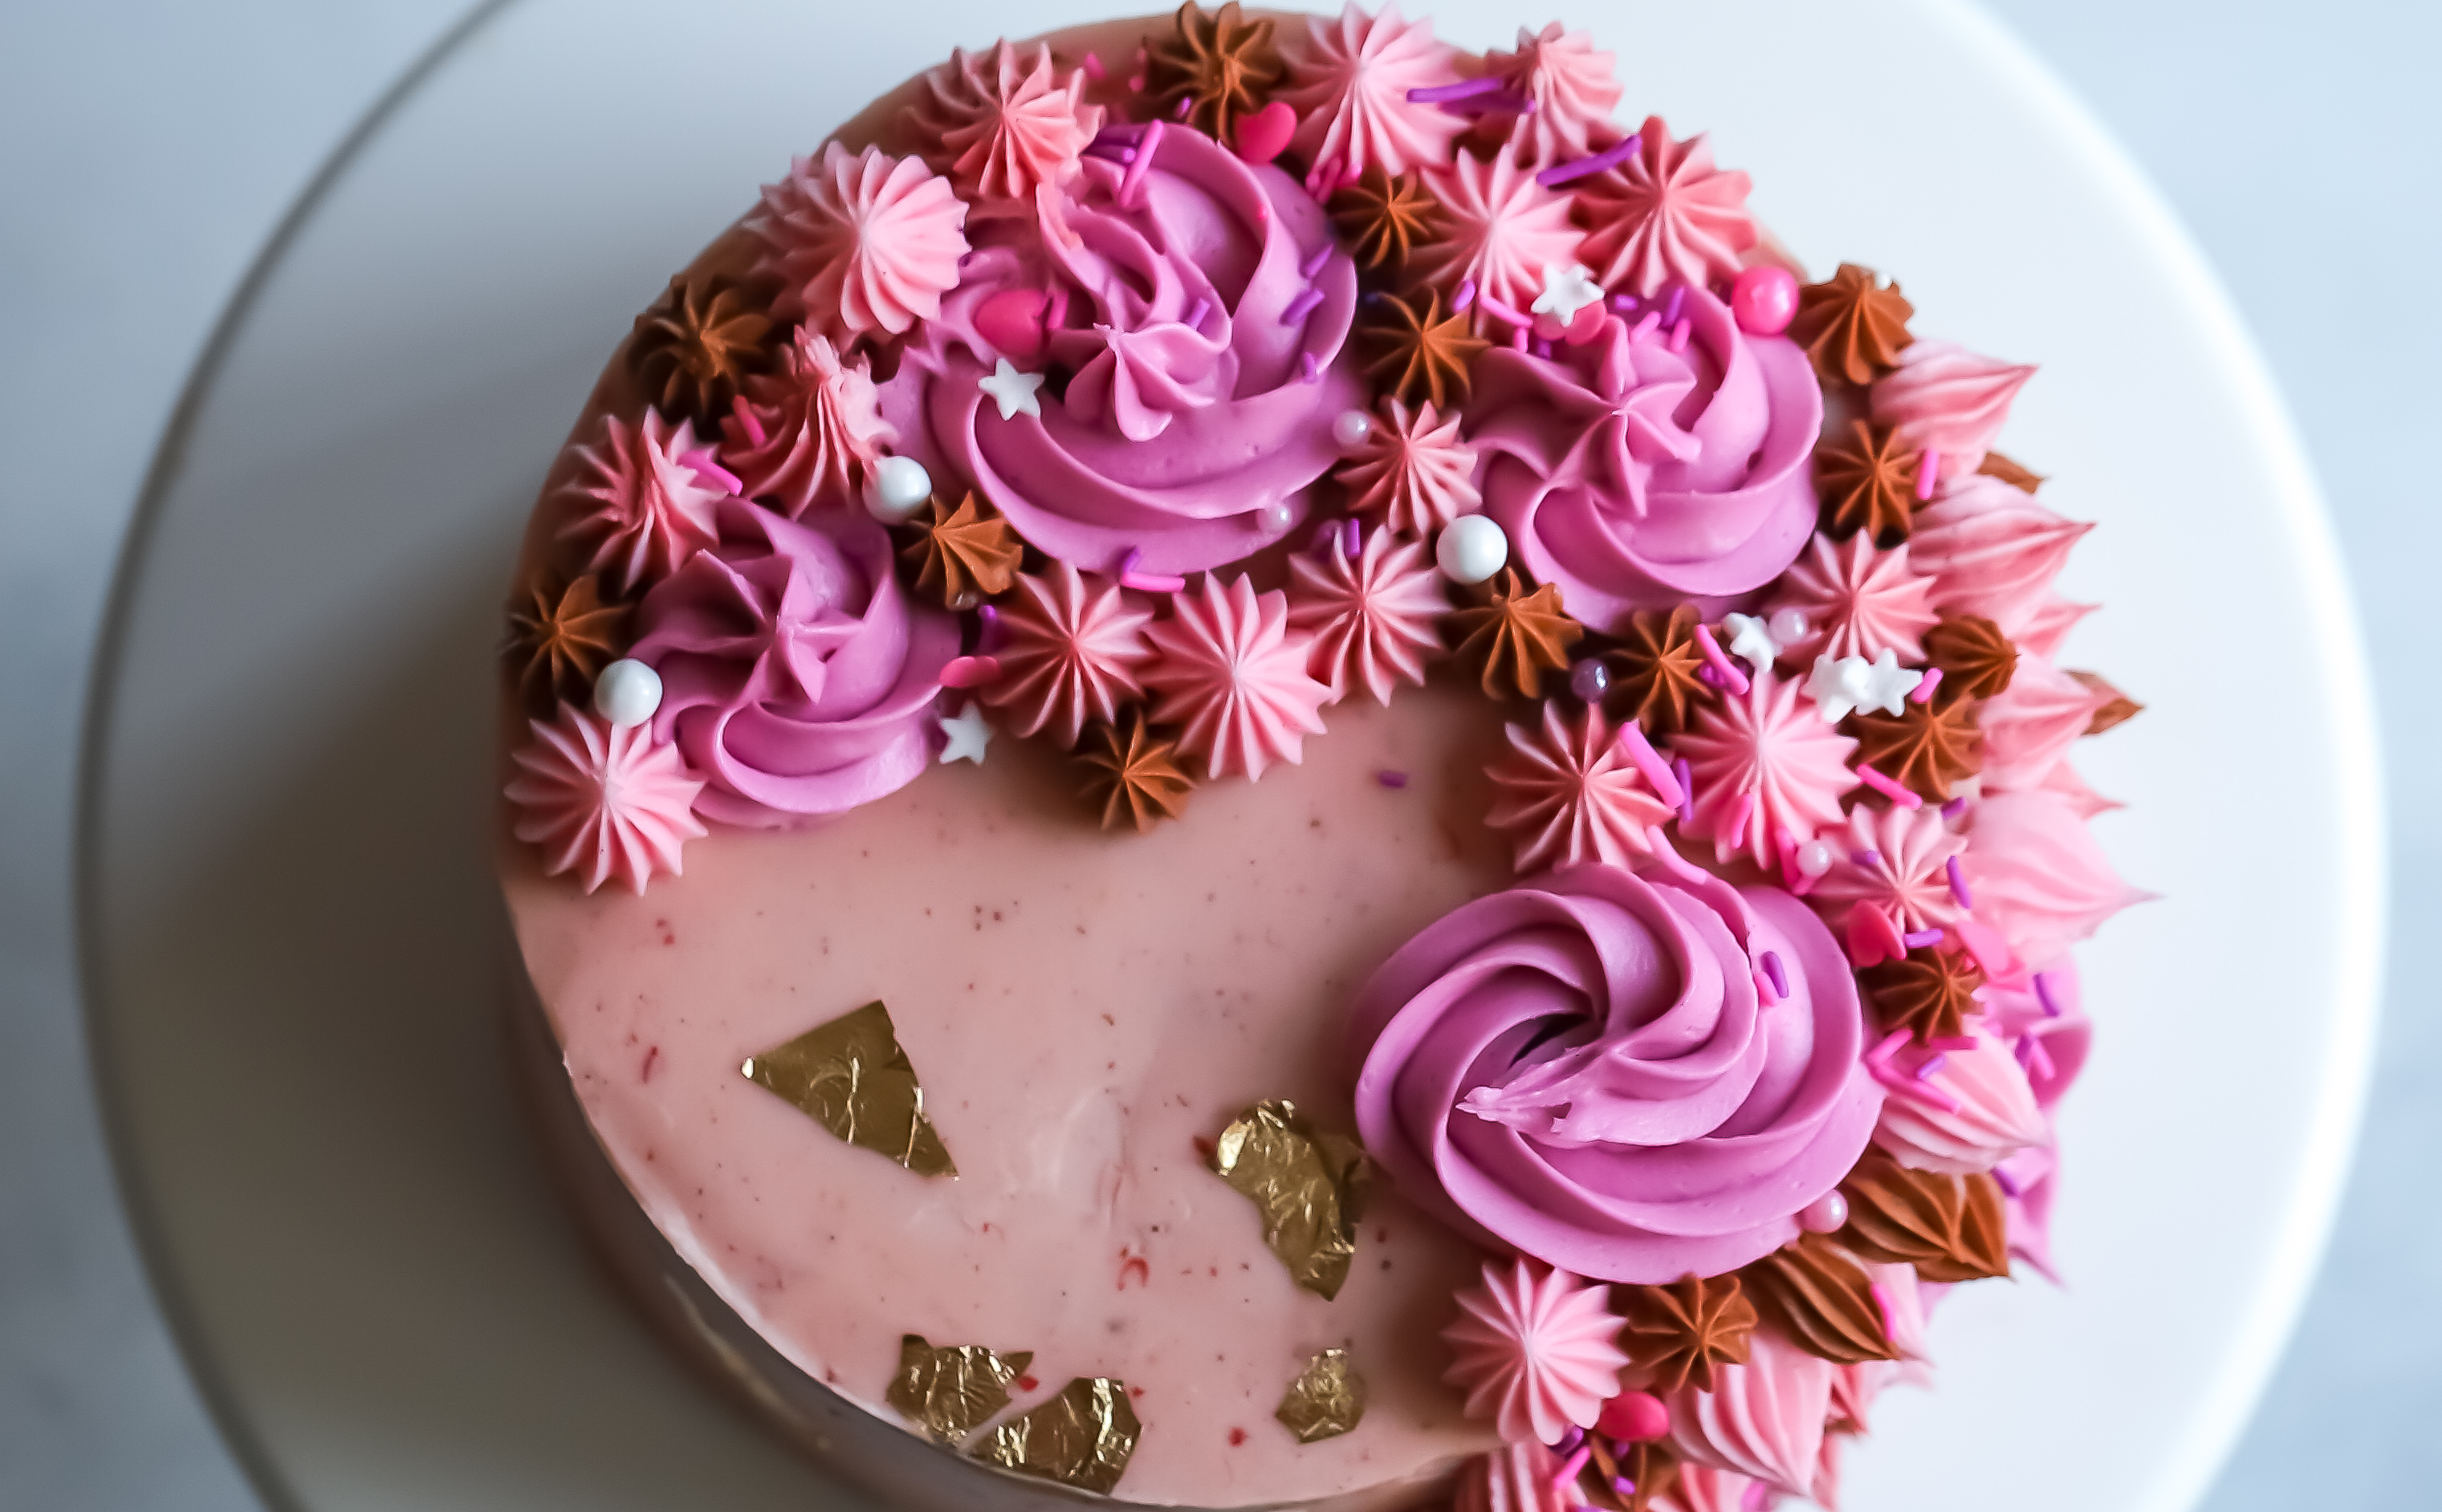
- Now it’s time to make it appear nice. Pipe your abstract pattern on the cake with the star tip and rosette tip piping bags. Using a clean dry brush, randomly apply edible gold leaf to the cake.
- Your cake is ready to serve!

Source: Thejamlab
Don’t miss interesting posts on Famousbio

